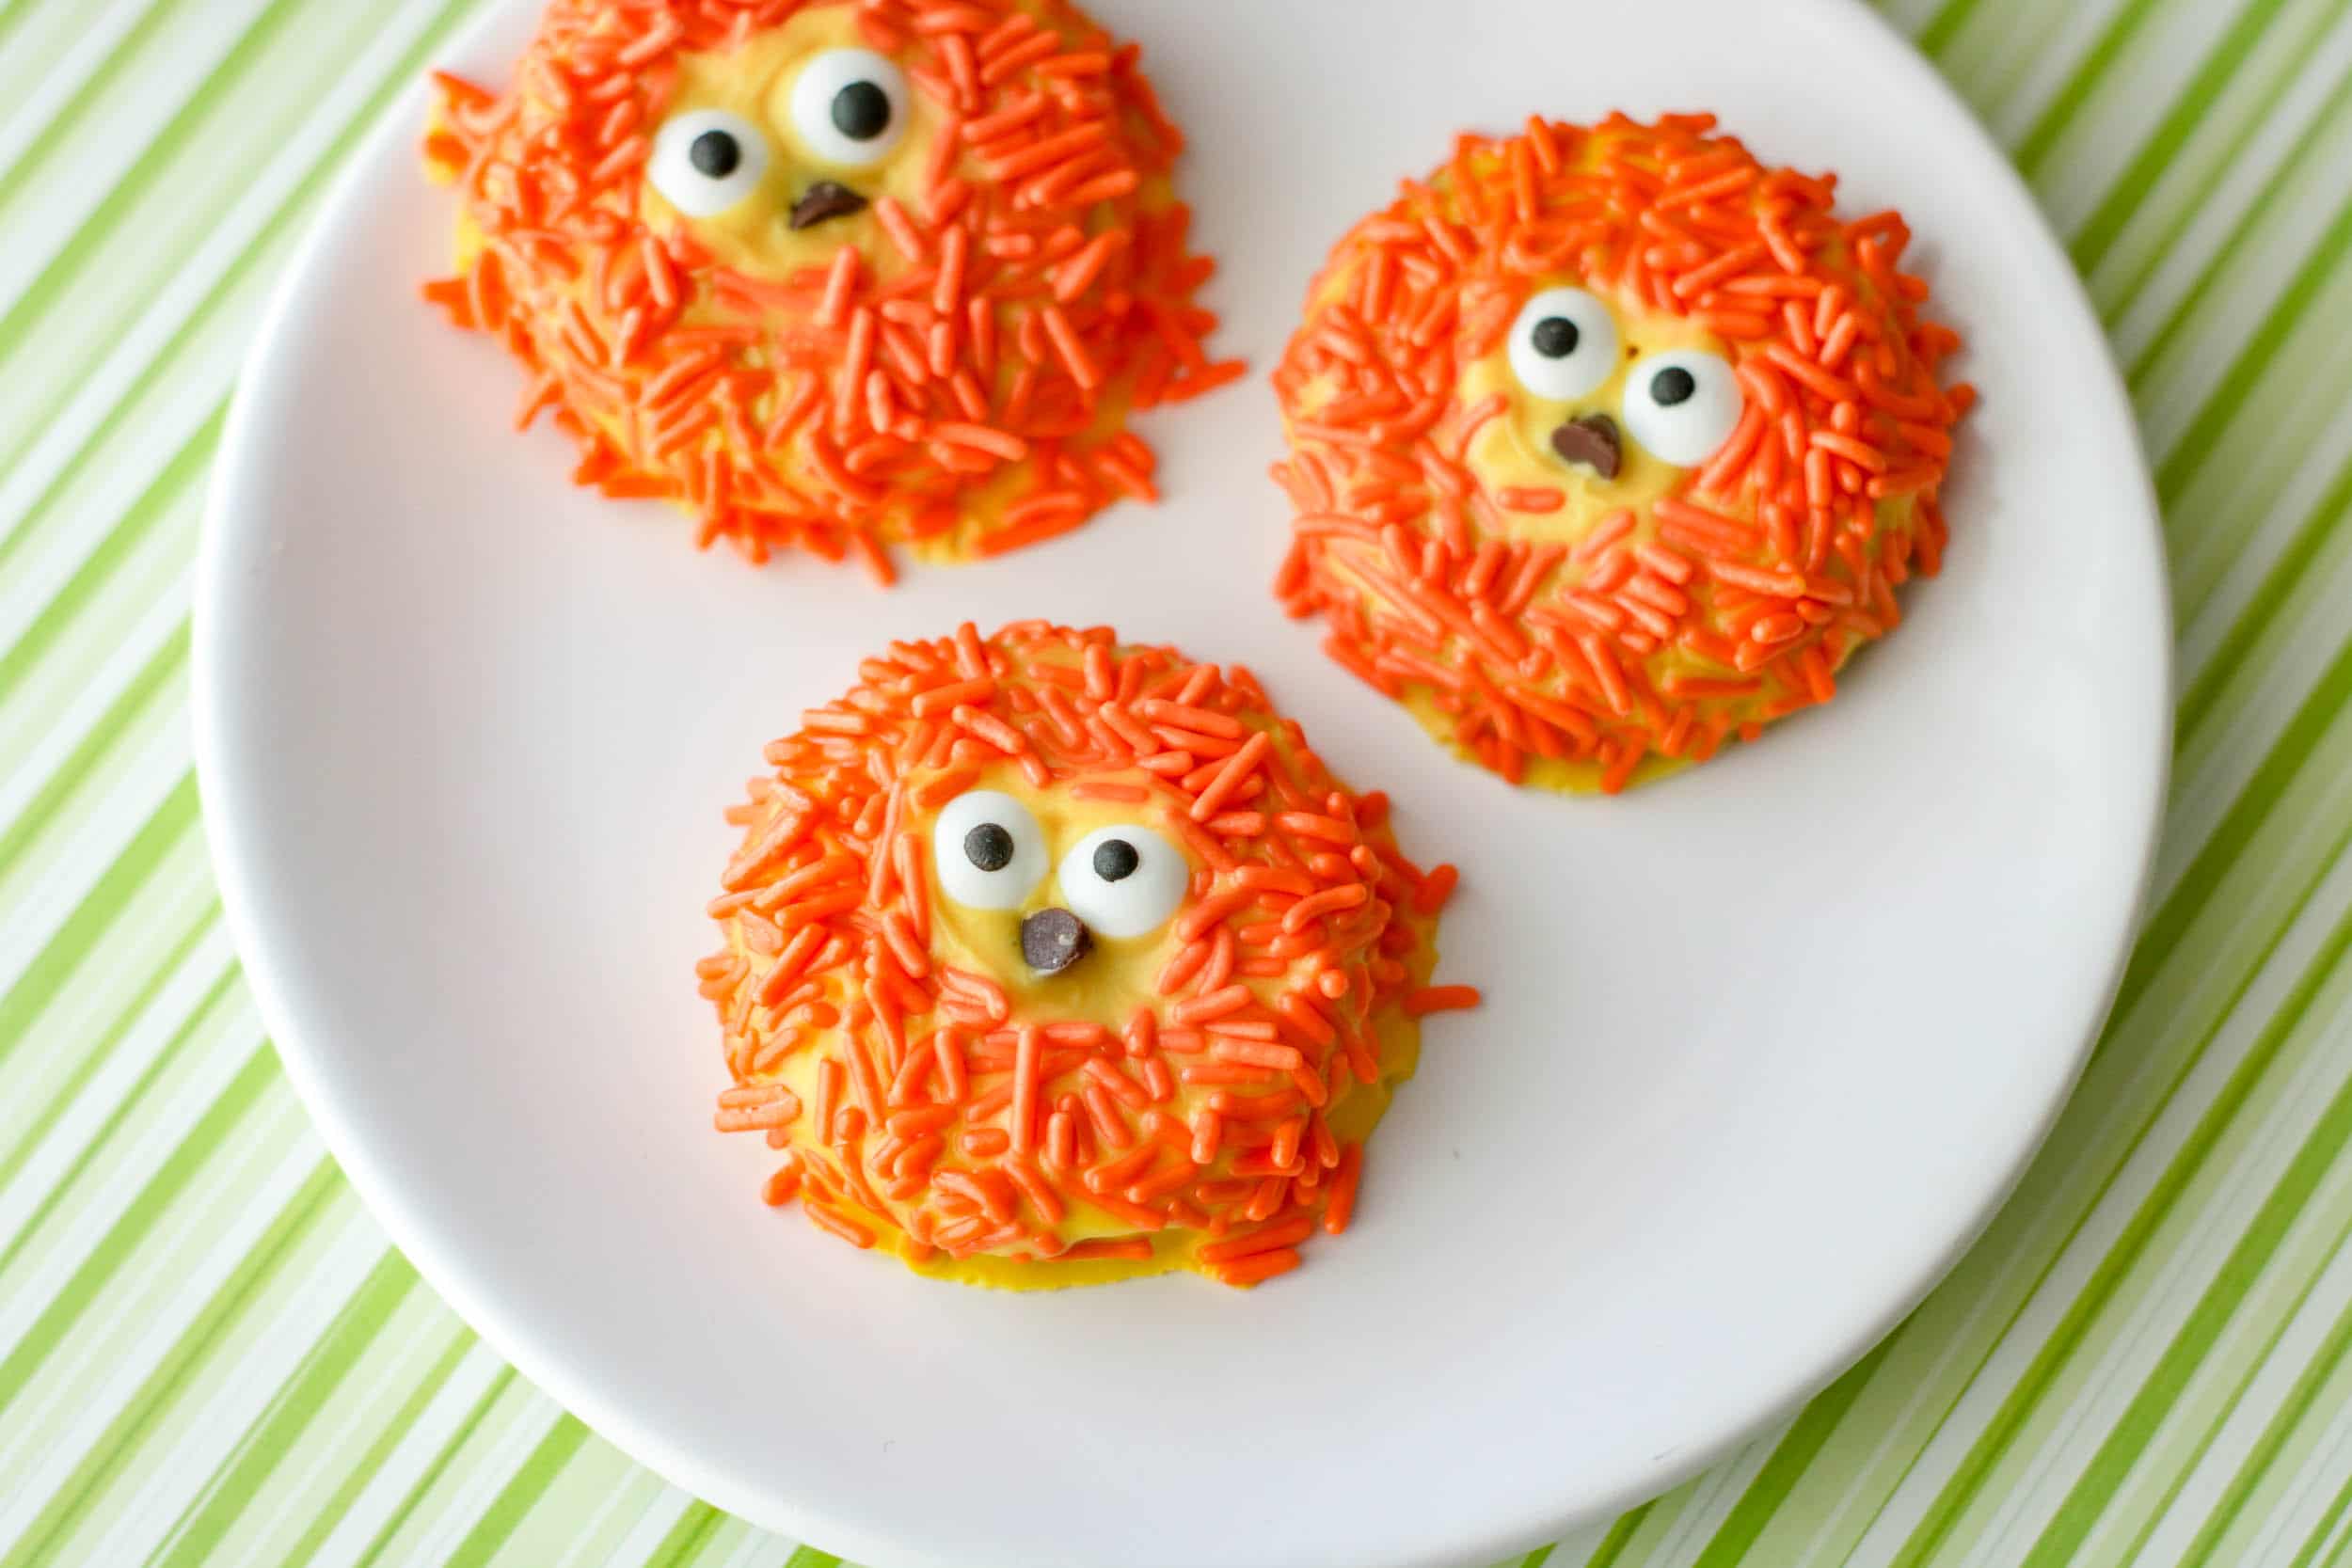
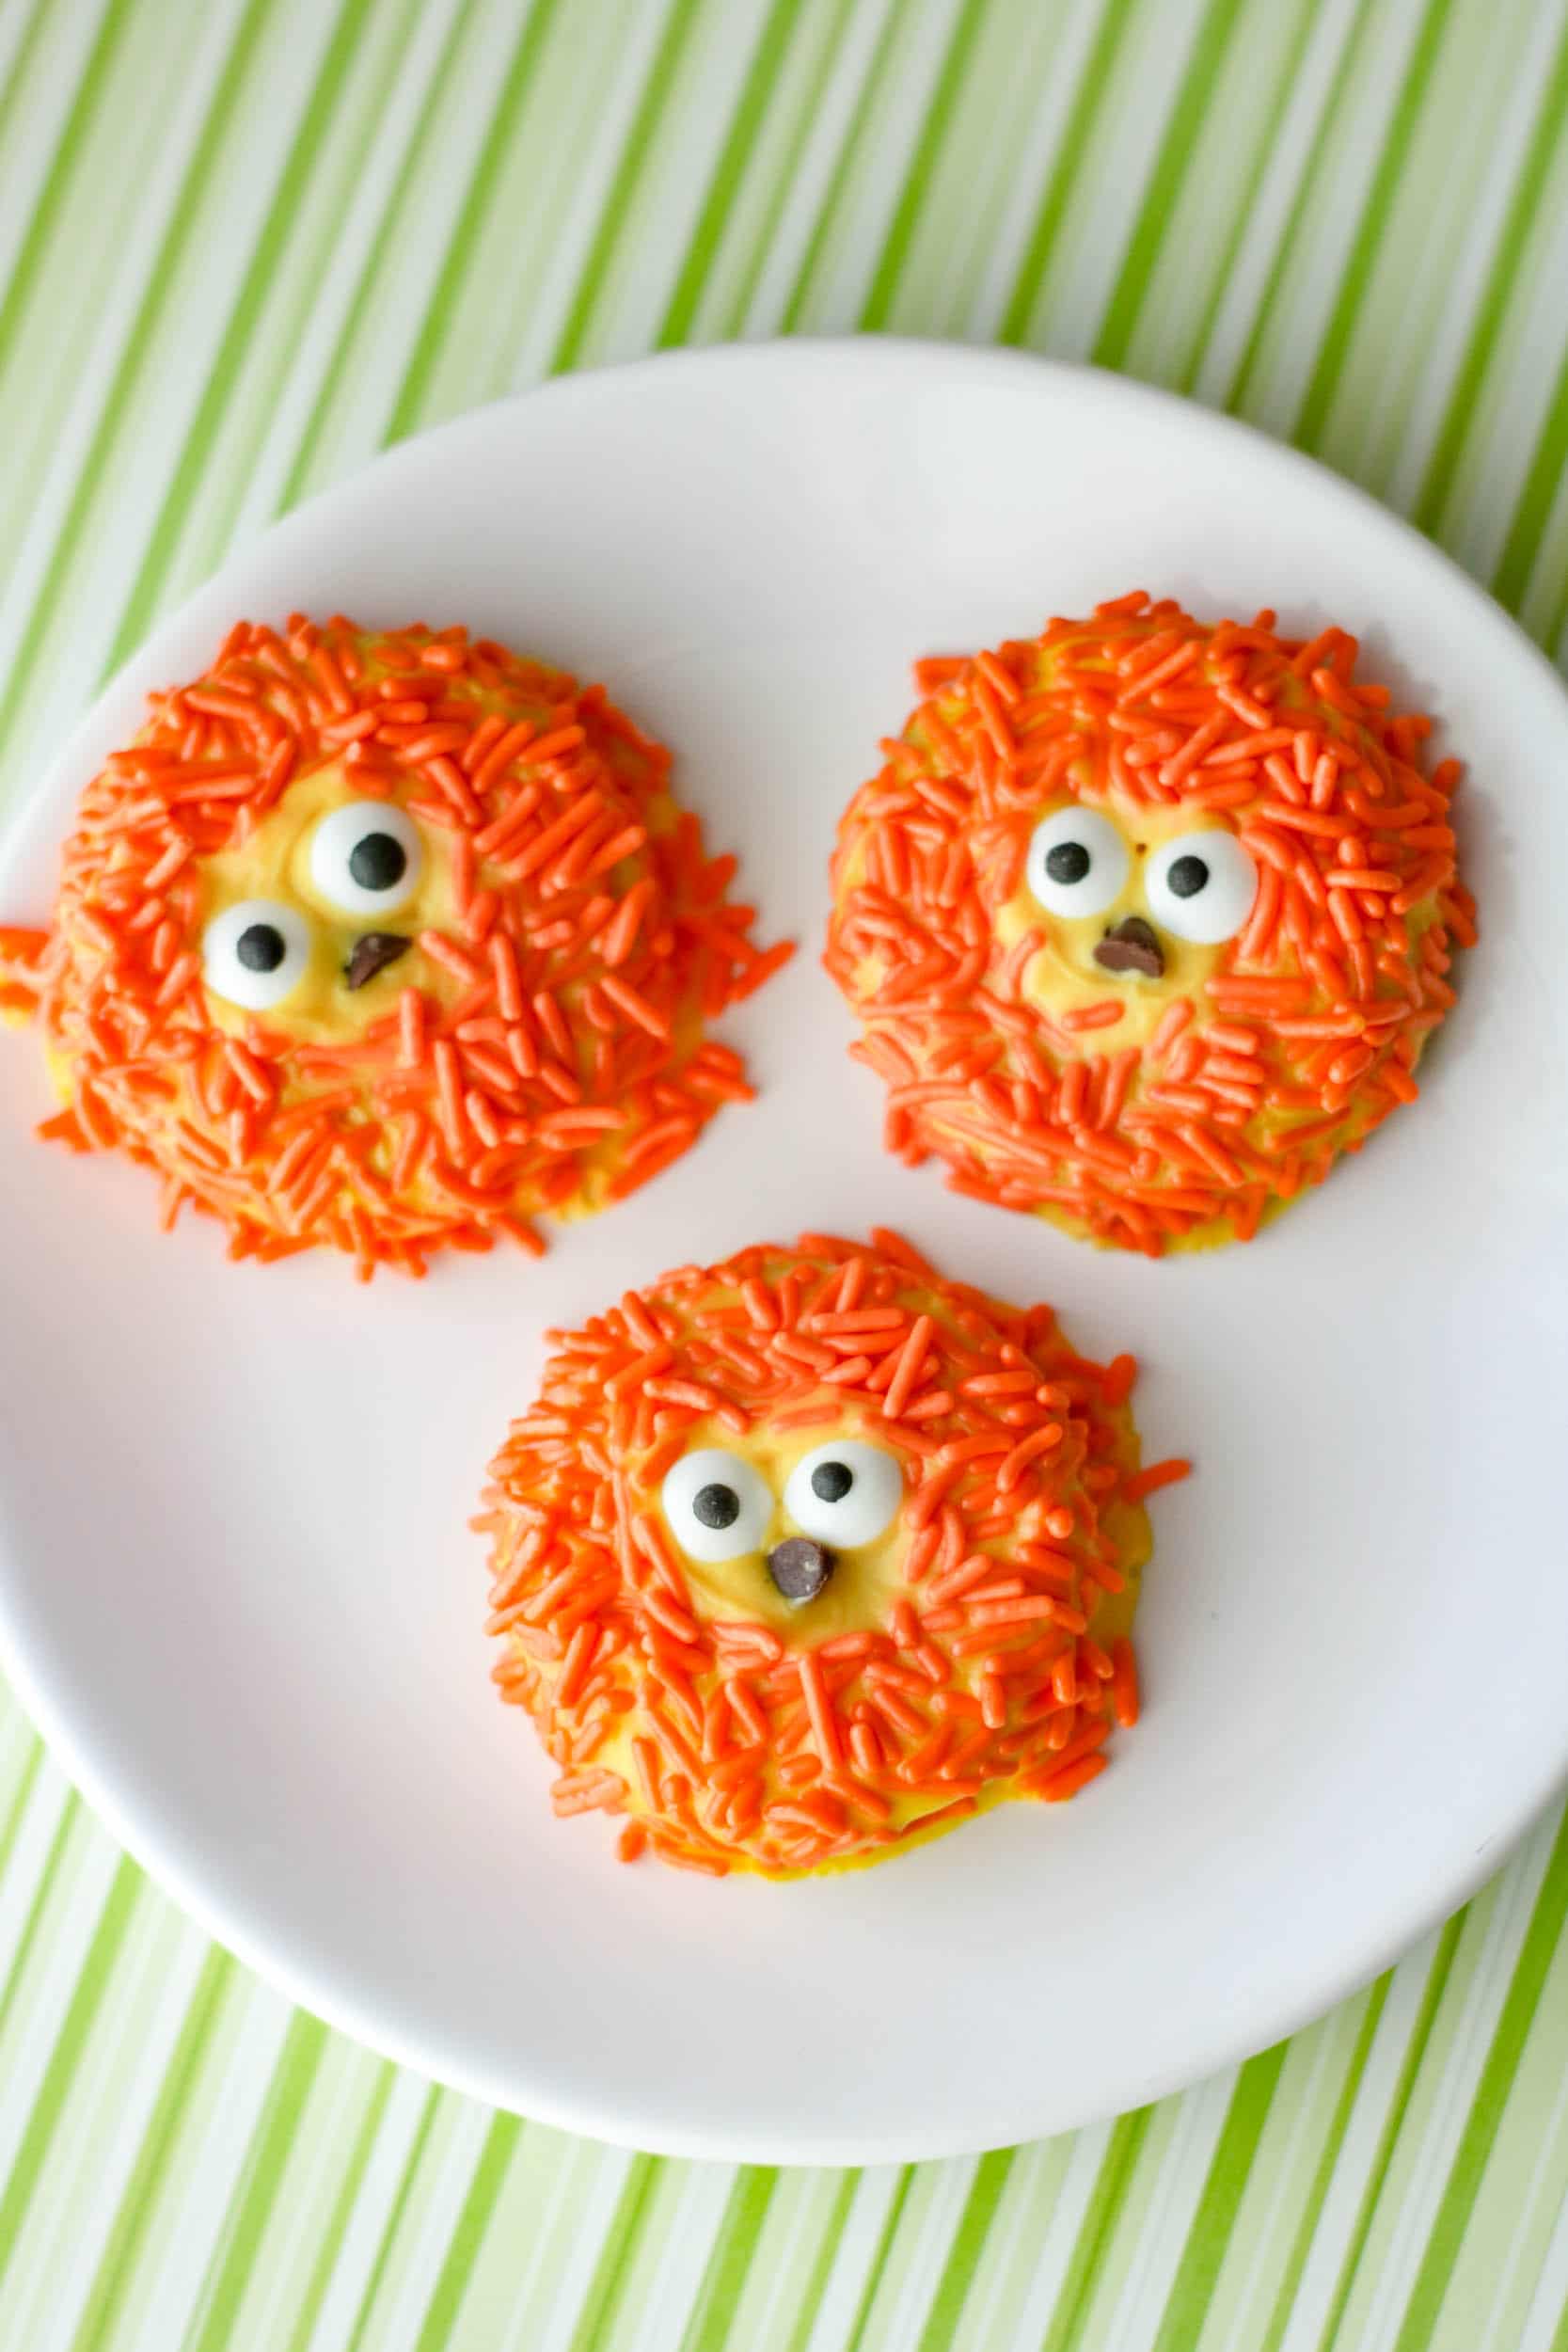
Zoo Series: Lion Oreo Cookies

Sometimes the best opportunities for quality time and learning with little ones happen in the kitchen! As parents, it’s great to make cooking fun and accessible for kids whenever we can. Today, we’re making Lion Oreo Cookies! These cookies are so fun and easy to decorate, and the result is adorable.
They would be perfect to make when studying lions with your little ones, such as on World Lion Day, which falls on August 10th. (You could also fix a Lion King Pizza with your kids for the occasion!)
How to Make Lion Oreo Cookies
You don’t really have to do any baking with these cookies (which makes them extra simple to do with kids). This one is all about the decorations!
For these cookies, I like to use Oreos (but any similarly-shaped “sandwich style” cookie will work.) You can even make them gluten-free by using these Goodie Girl Chocolate Creme Cookies.
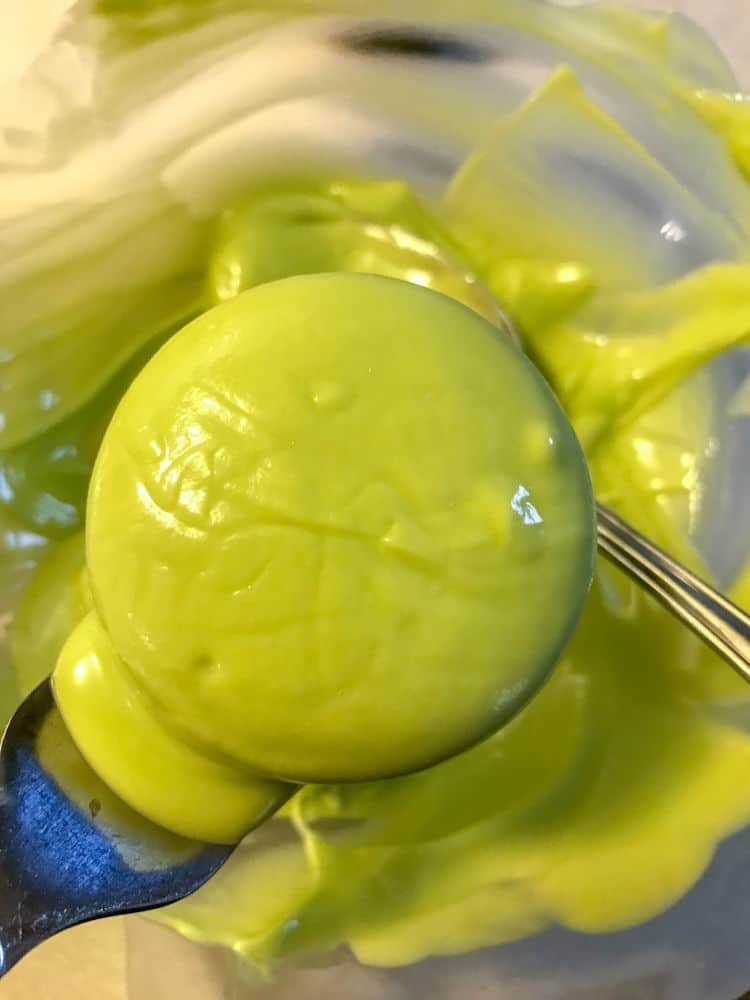
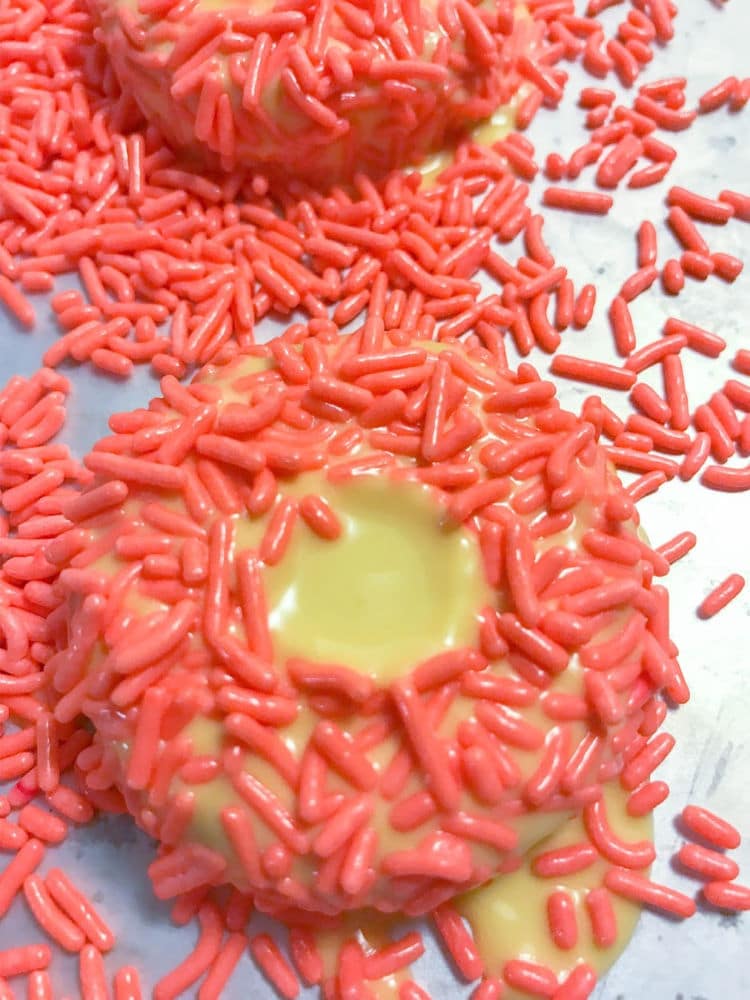
Before you get started, you’ll want to prepare a surface by lining a baking sheet with wax paper. (Things could get messy!) Next, put your yellow melting chocolate into a microwave bowl and begin melting it in short (15 second) bursts in the microwave. I like to take it out and stir it after each burst. If the melting chocolate is too thick, you can add a teaspoon of coconut oil and stir it in. This will make it smooth and help it coat the cookie easily!
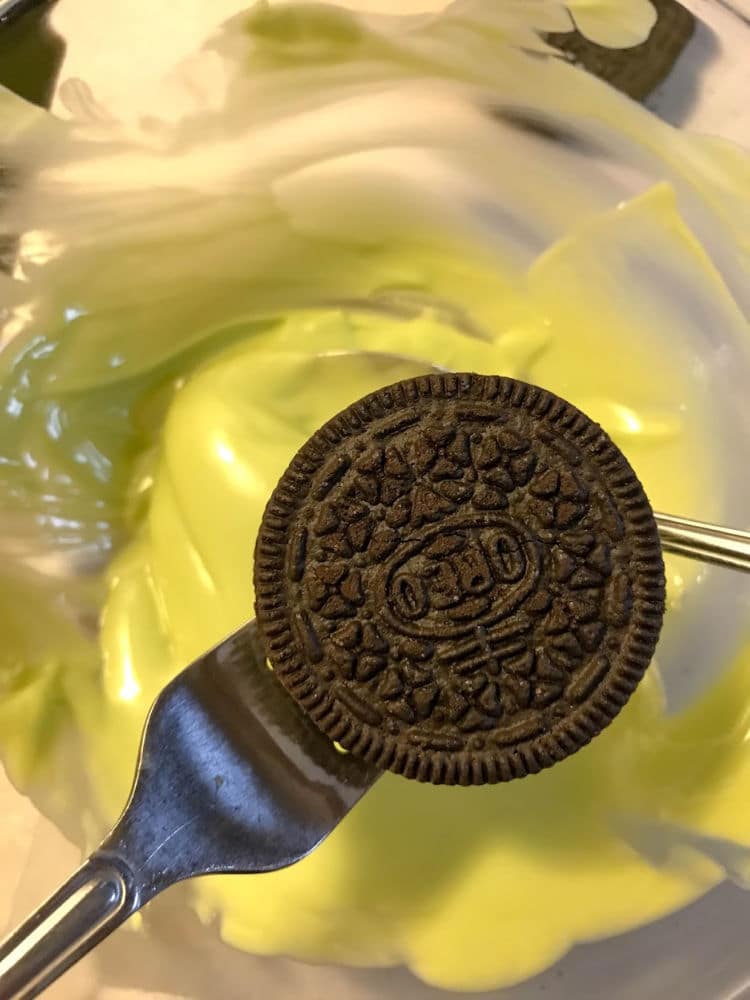
Using a fork or tongs (or whatever works for you), dip each Oreo cookie into the yellow melting chocolate until it’s completely coated. Remove each cookie and tap it gently against the side of the bowl, so that the excess melting chocolate drips off. If air bubbles form, pop them with a toothpick. Place each cookie onto the waxed paper.
Before the melting chocolate dries, decorate the cookie with orange sprinkles around the edges for the lion’s “mane.” A trick I like to use to keep sprinkles off the lion’s face is simply to use place a piping tip in the center of each cookie while I sprinkle! It’s exactly the right size and shape to keep the lion’s “face” protected.
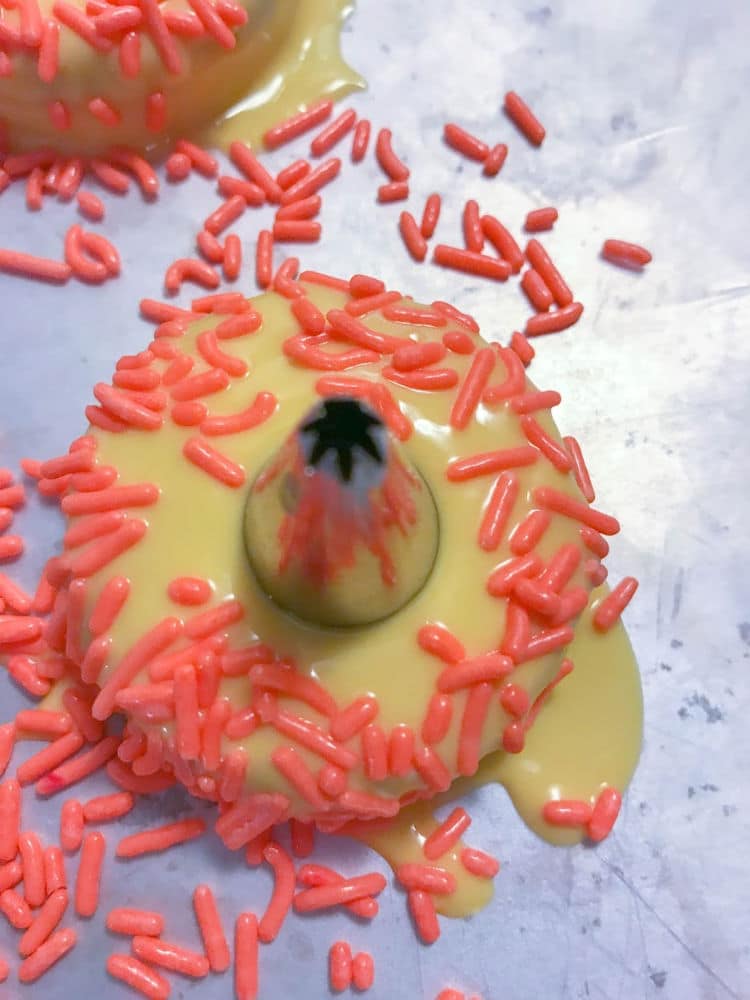
And when you pull the piping tip off, you can already see that your cookie is starting to look like a lion!
While the melting chocolate is still wet, press two candy eyes into place on each cookie.
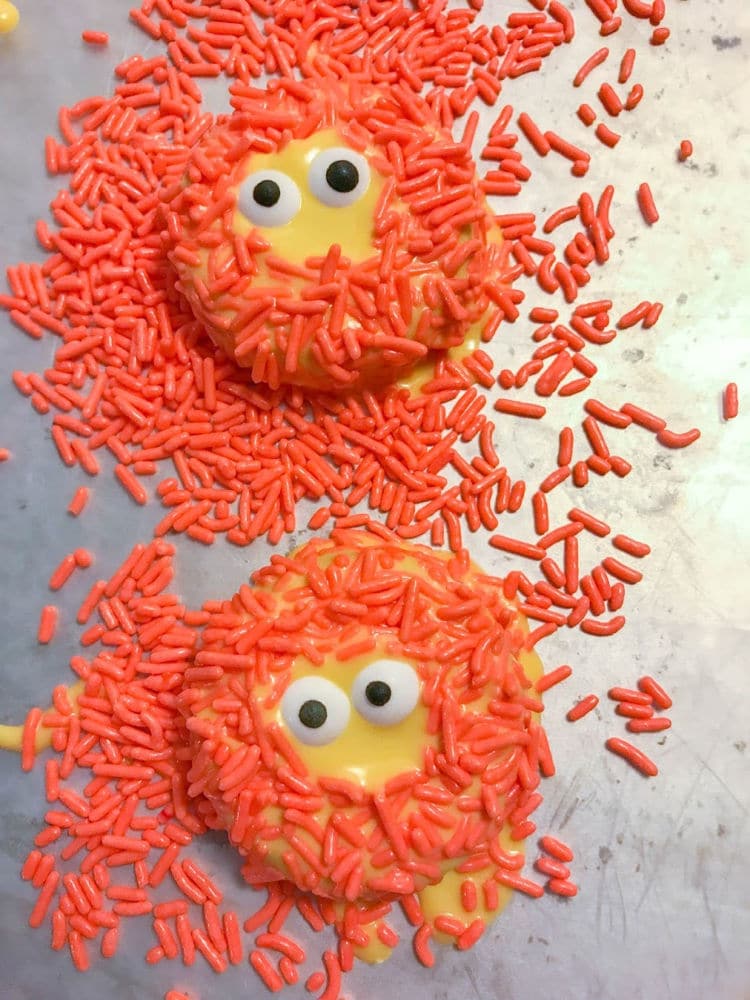
Next, place a mini chocolate chip onto each lion cookie as the lion’s nose!
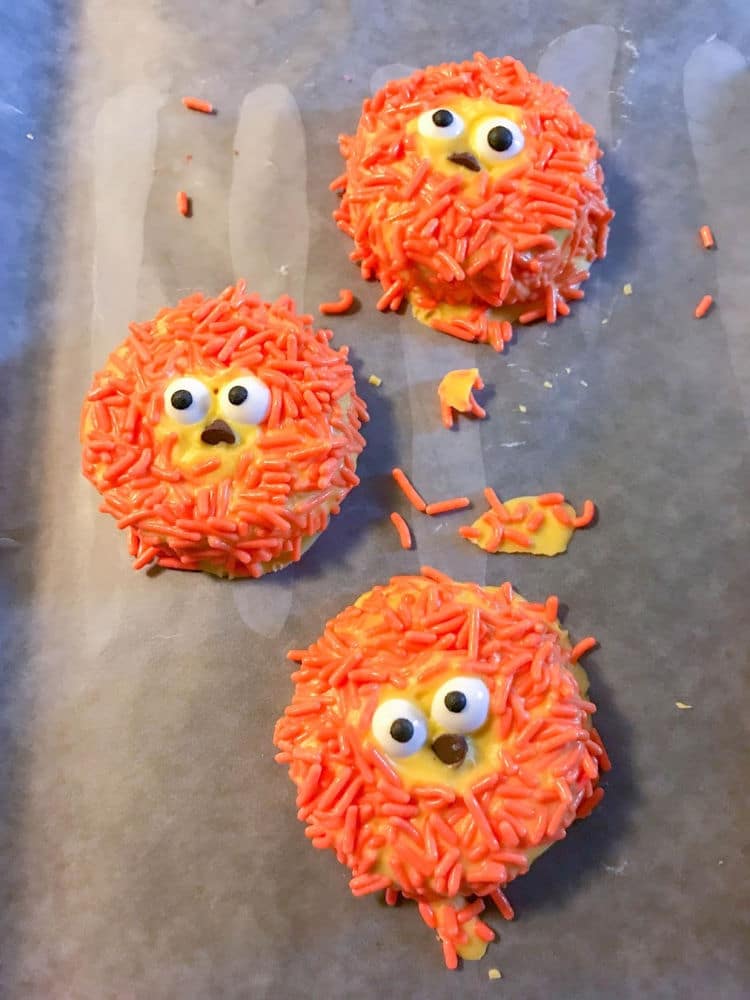
That’s all there is to it! These candy lion Oreo cookies are so simple and adorable. I know that the kids in your life will enjoy making them, especially if they love lions!
To store your lion cookies, allow them to set completely at room temperature. You can also refrigerate them for faster results. If you can resist eating them all immediately, store these cookies in an airtight container at room temperature.
Do you have children who love to help out in the kitchen? Let us know if you make these easy and fun lion Oreo cookies with them!

Zoo Series: Lion Oreo Cookies
Description
These easy and adorable cookies would be so much fun to make while studying lions with your little ones! No baking required—just decorating fun!
Ingredients
Ingredients
1 (15.35 ounce) package Double Stuf Oreo Chocolate Sandwich Cookies
1 (12 ounce) package yellow candy melts wafers
Orange jimmies sprinkles
Mini chocolate chip morsels
Instructions
- Line a baking sheet with waxed paper.
- Melt yellow candy coating according to package directions. If the candy is too thick to pour, add 1 teaspoon coconut oil or vegetable shortening. Stir well. Do not add water. You can add up to 1 tablespoon of coconut oil per bag of candy wafers.
- Dip each cookie into melted candy. Remove cookie, tapping gently against the side of the bowl, allowing excess candy to return to the bowl. If air bubbles form, pop them with a toothpick. Place the cookie onto the waxed paper.
- Immediately decorate with orange sprinkles, using a clean piping tip to protect the middle of the “face.” Remove the piping quickly with a slight twist.
- While the candy is still wet, press candy eyeballs and mini chocolate chips (as the nose) into place.
- Allow cookie to set completely at room temperature or refrigerate for faster results. Store in an airtight container as room temperature.