Baked Braided Buns

Fall is creeping in—finally! The mornings are cooler, the pumpkins are showing up on porches, and my kids are starting to dig out their sweaters (even though it’s still 72 degrees by noon). Around here, fall also means baking season. There’s just nothing like the smell of warm bread drifting through the house while the kids are working on math or sprawled out with their books. It makes the whole house feel cozy, even if the laundry mountain is lurking in the corner.
These braided buns are the perfect weekend project to do with your kids. They do take a little time—between kneading, rising, and braiding—but that’s the charm. It’s slow baking at its best. While you wait for the dough to rise, you can read a fall picture book together, work on a puzzle, or send the kids outside to gather leaves for a craft. Then everyone comes back to the kitchen to roll, cut, and braid. (Kids love the braiding part—it’s basically playdough that you get to eat.)
And the best part? These buns make your whole house smell like a bakery. Think warm yeast bread with a buttery, herby finish. They’re wonderful on their own, but you can also tuck in fillings—cheese, ham, spinach, or even something sweet—before braiding.
Here’s how to make them:
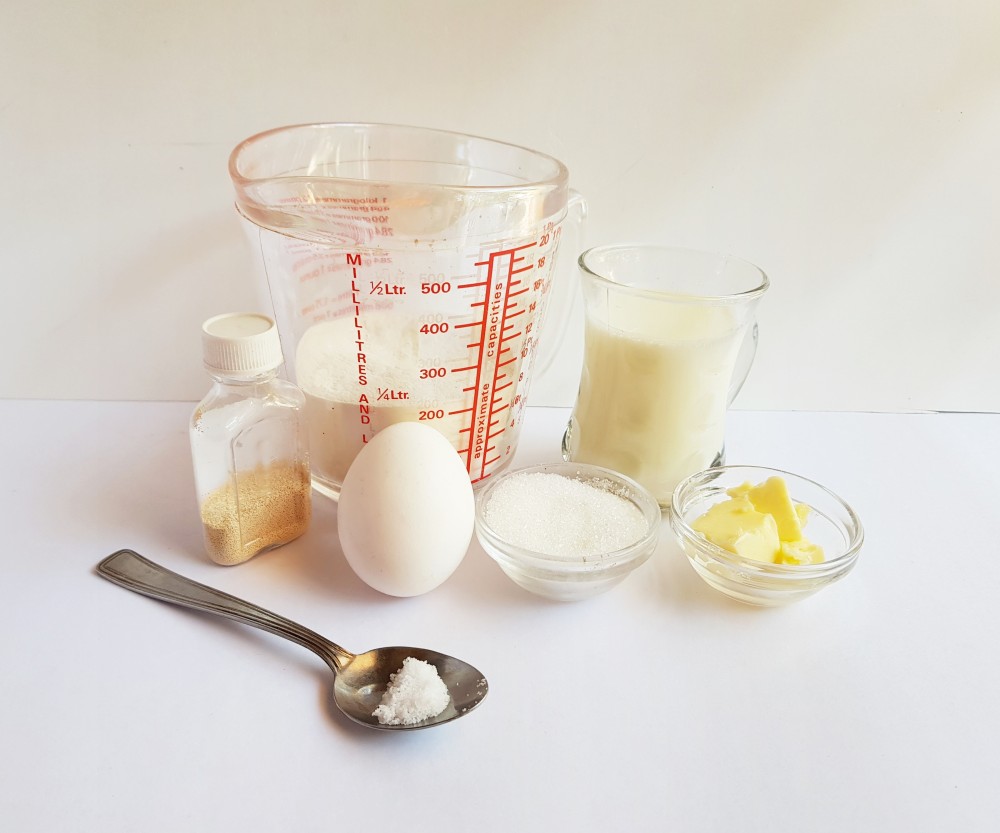
Ingredients for Braided Buns
(See Azure Standard’s information below for non-GMO, organic products)
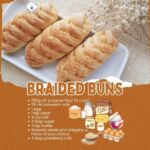
- 250 g all-purpose flour (about 2 cups)
- 115 ml lukewarm milk
- 1 egg
- 1 tsp yeast
- ¾ tsp salt
- 3 tbsp sugar
- 4 tsp butter
- 4 tbsp powdered milk
- Sesame seeds and oregano (or herbs of your choice)
Azure Standard
We have a new partnership with Azure Standard. I decided they were the perfect partner because it is so rare to find a company that feels less like a business and more like family. Yes, they deliver natural, bulk, and specialty foods all across the country—but at their heart, they’re a family (and friends who might as well be family!) who simply want to share what they’ve learned and make good food affordable.
Because really, every family should have access to wholesome, organic, non-GMO foods that help us live strong, meaningful lives. That’s the standard they hold themselves to—and it’s why I keep coming back.
New to Azure Standard?
Special Offer for Our Readers
If you would like to experience the blessings of healthy, affordable, whole-food living through Azure Standard, now is the perfect time to get started.
Use Promo Code: HIPHOMESCHOOL for 15% off your first order as a new customer.
To qualify, create a new Azure account and place a minimum order of $100, shipped to a drop location of your choice. Be sure to enter the promo code at checkout. This special offer is available exclusively for new customers and expires December 31, 2028 (unless extended).
Start your journey here: Azure Standard
Already an Azure Customer?
We didn’t forget you! We have an exclusive offer just for our Hip Mom audience. Use the code HIP7 at checkout to receive 7% off orders of $100 or more in products. Note: The code is valid for two uses.

Directions for Braided Buns
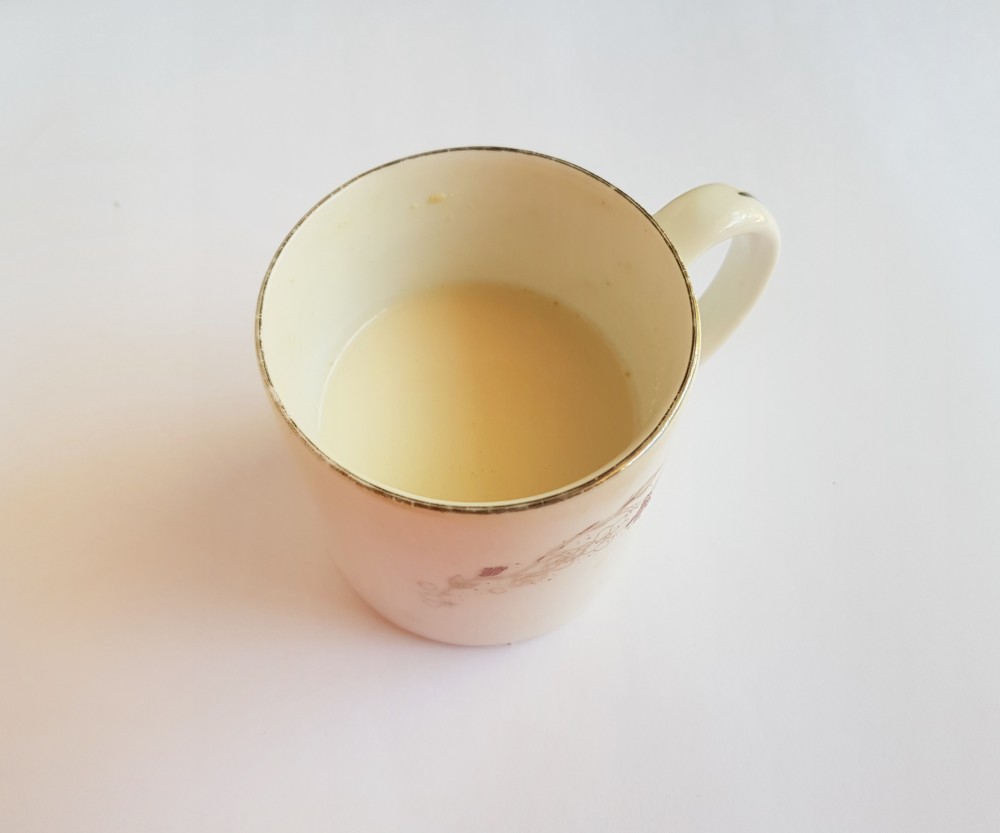
Step 1: In a small bowl, add the yeast and sugar to the lukewarm milk. Stir and let it sit for a few minutes to wake the yeast up.
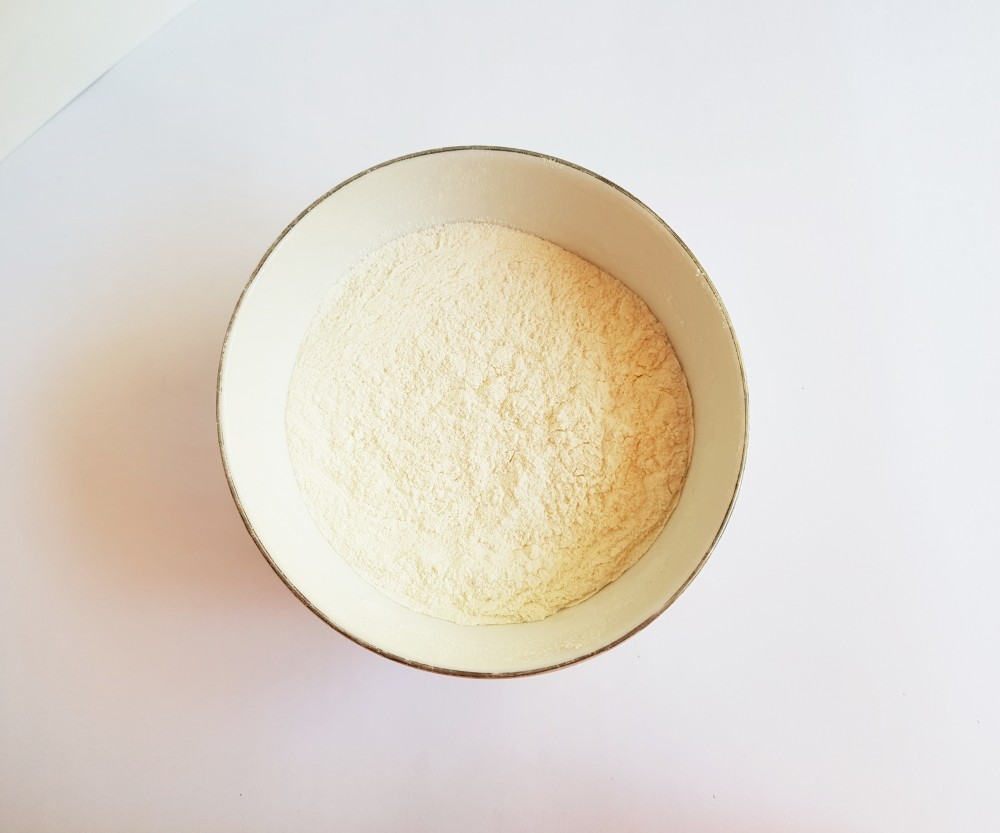
Step 2: In a separate bowl, sift together the flour, powdered milk, and salt.
Step 3: Add the yeast-milk mixture to the flour bowl. Melt the butter, let it cool slightly, and add it in along with the egg. Mix everything together until it forms a sticky dough.
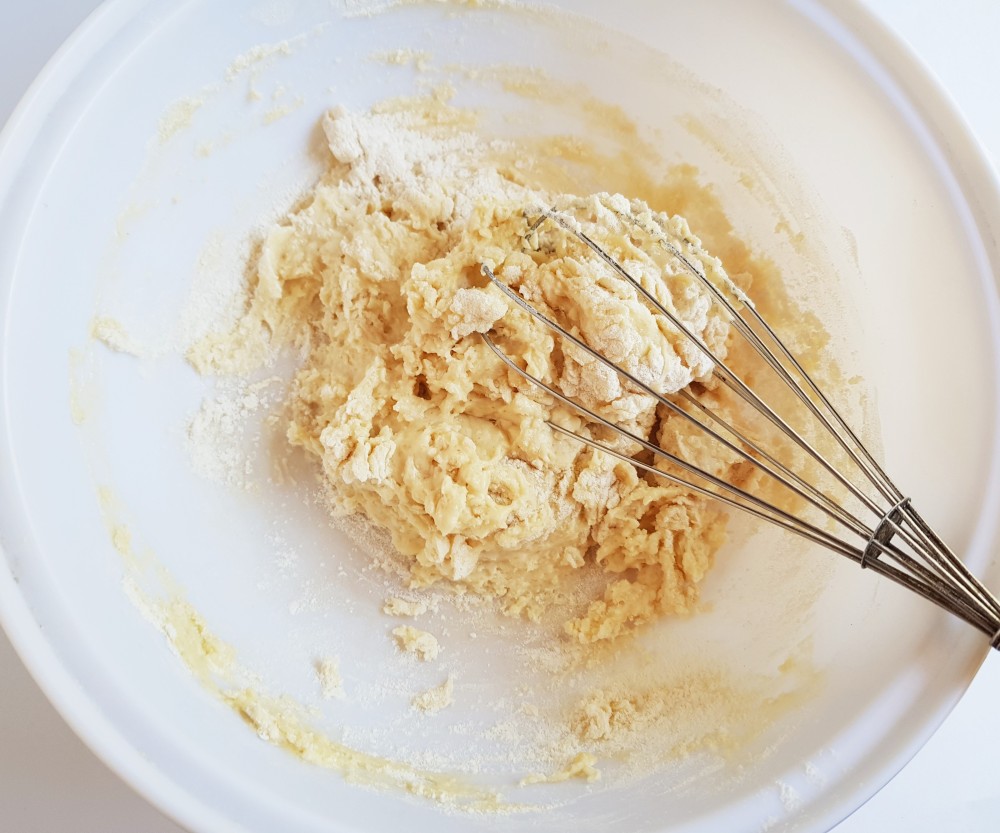
Step 4: Knead the dough by hand. It will feel sticky at first, but keep going—eventually it becomes smooth and elastic. (Sprinkle in a little flour if needed, but don’t overdo it.)
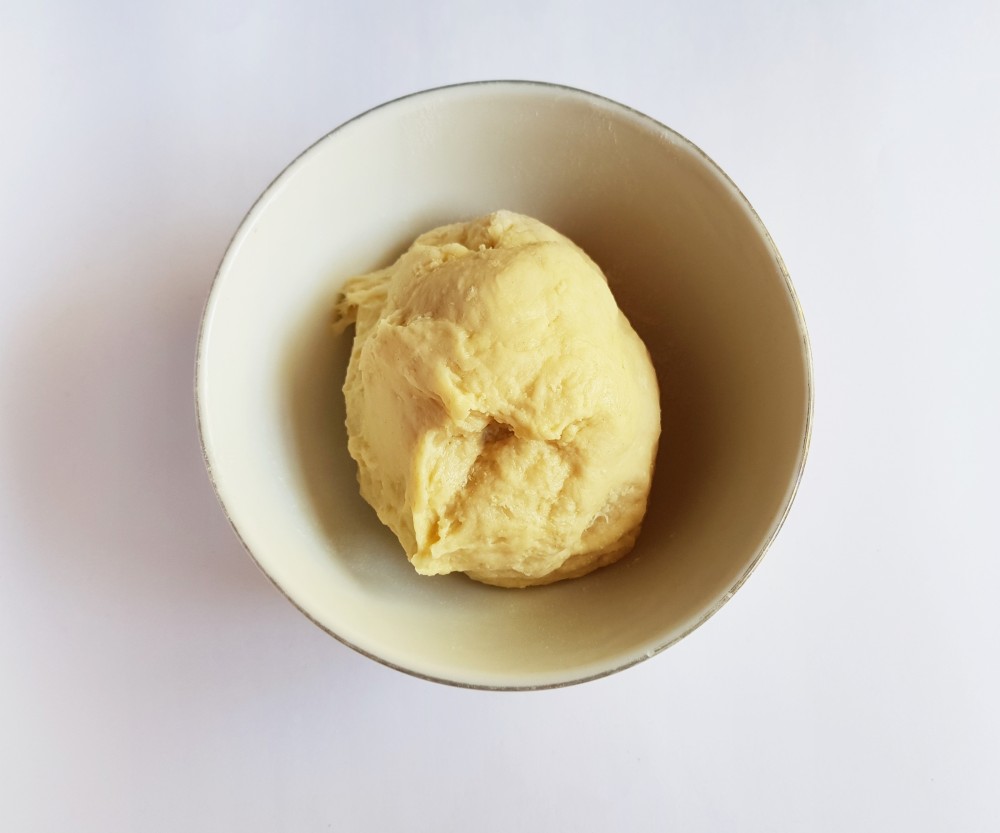
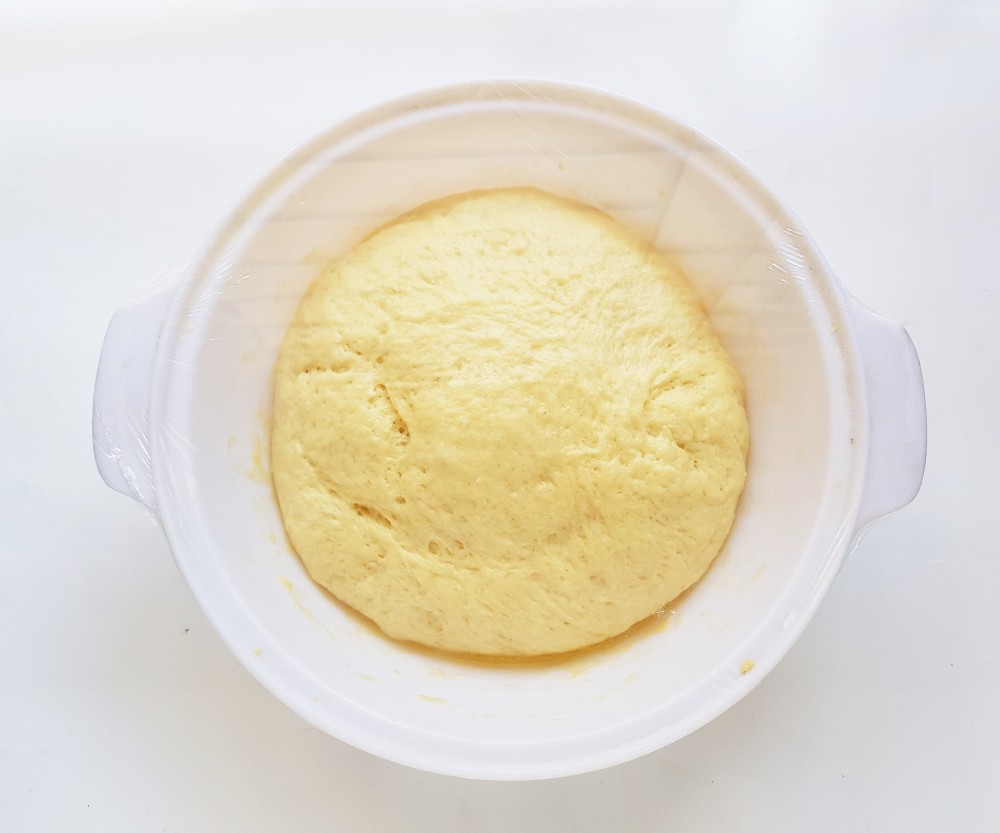
Step 5: Shape the dough into a ball, place it in a bowl, brush lightly with oil, and cover. Let it rise for about an hour, until it has doubled in size.
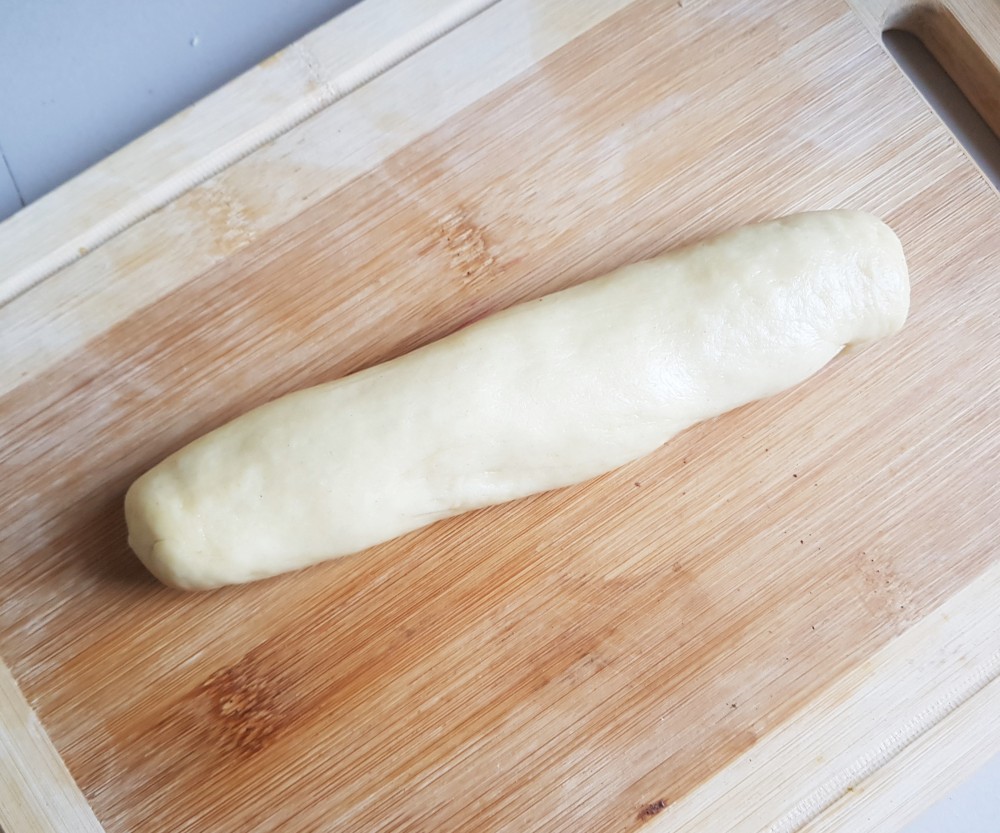
Step 6: Roll the dough out into a long rope, then cut it into even sections.

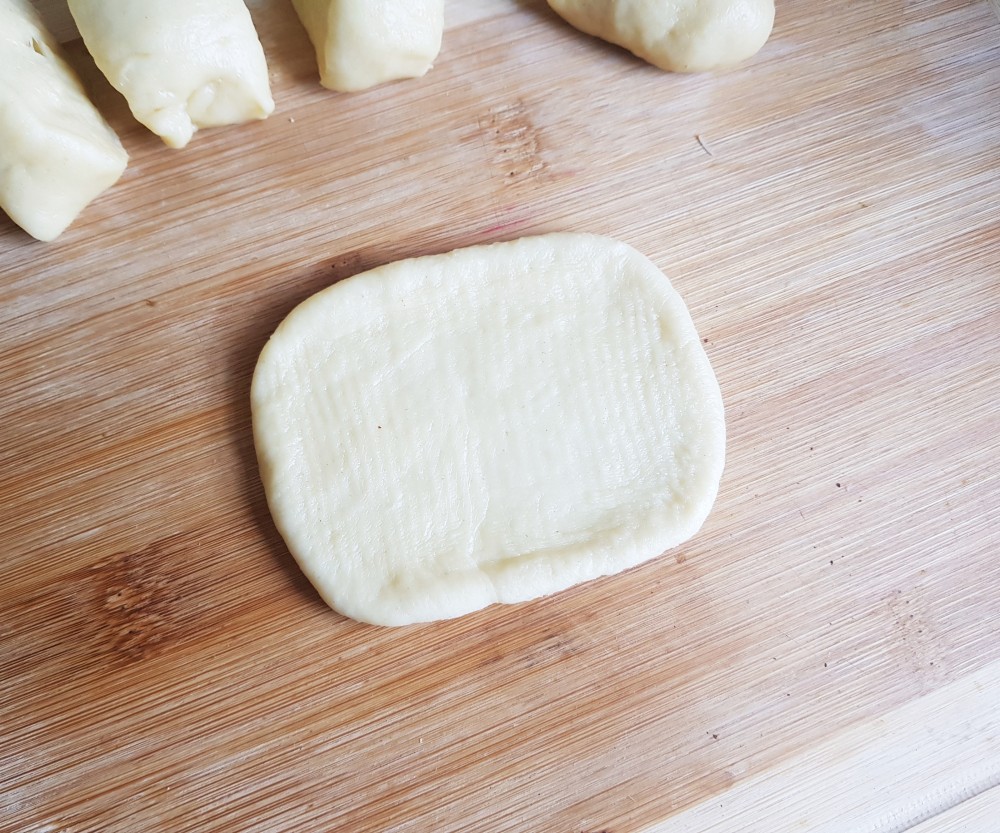
Step 7: Take one section and roll it into a small ball. Flatten it into a square with a rolling pin.

Step 8: (Optional) Add your favorite filling along the middle of the square—savory or sweet.
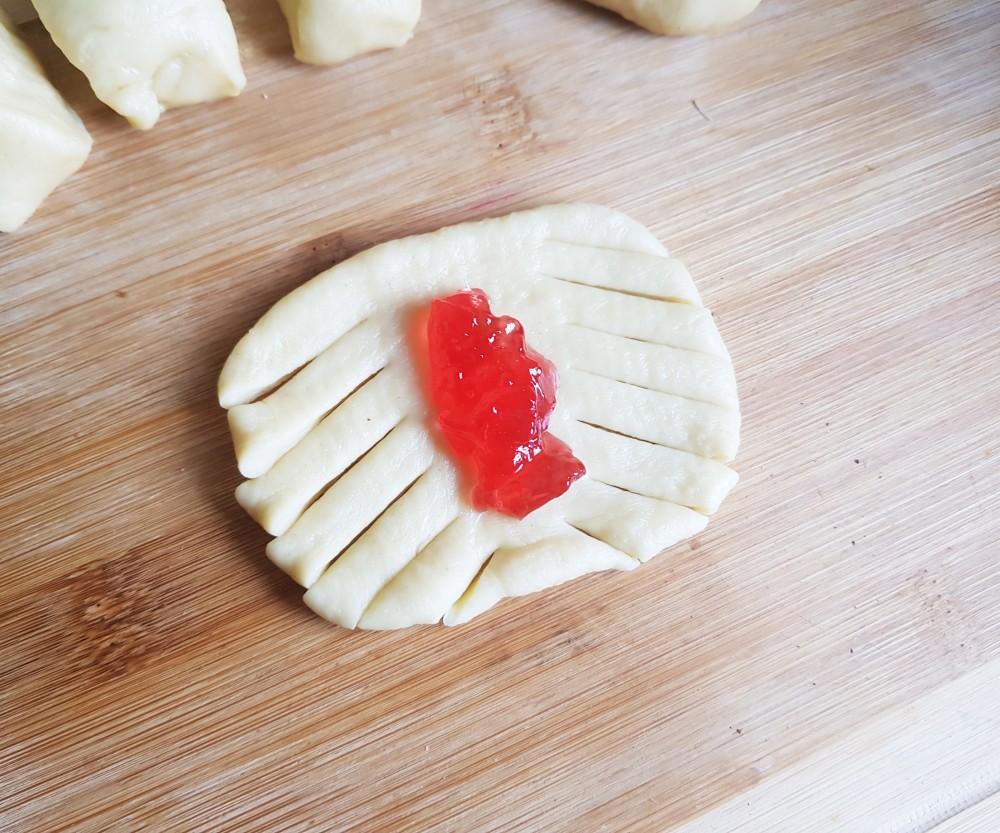
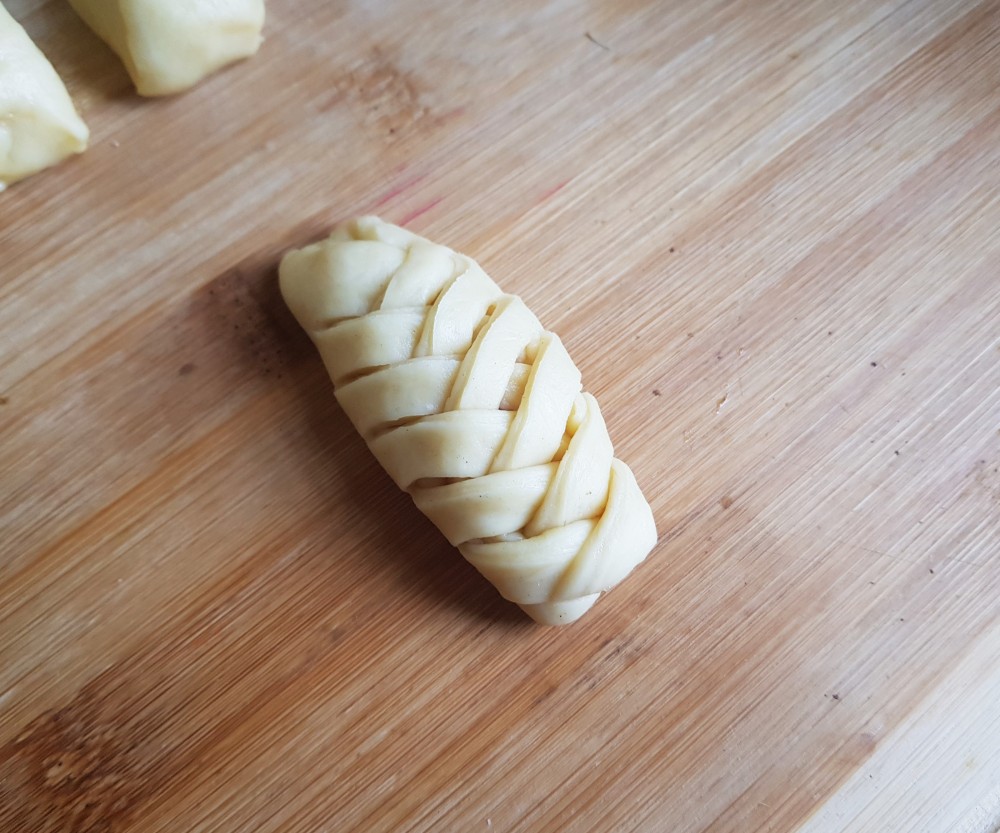
Step 9: Cut diagonal slits on both sides of the dough. Now the fun part: braid the dough by pulling the strips across the filling, one side at a time, until you’ve got a neat braid. Tuck the ends underneath.

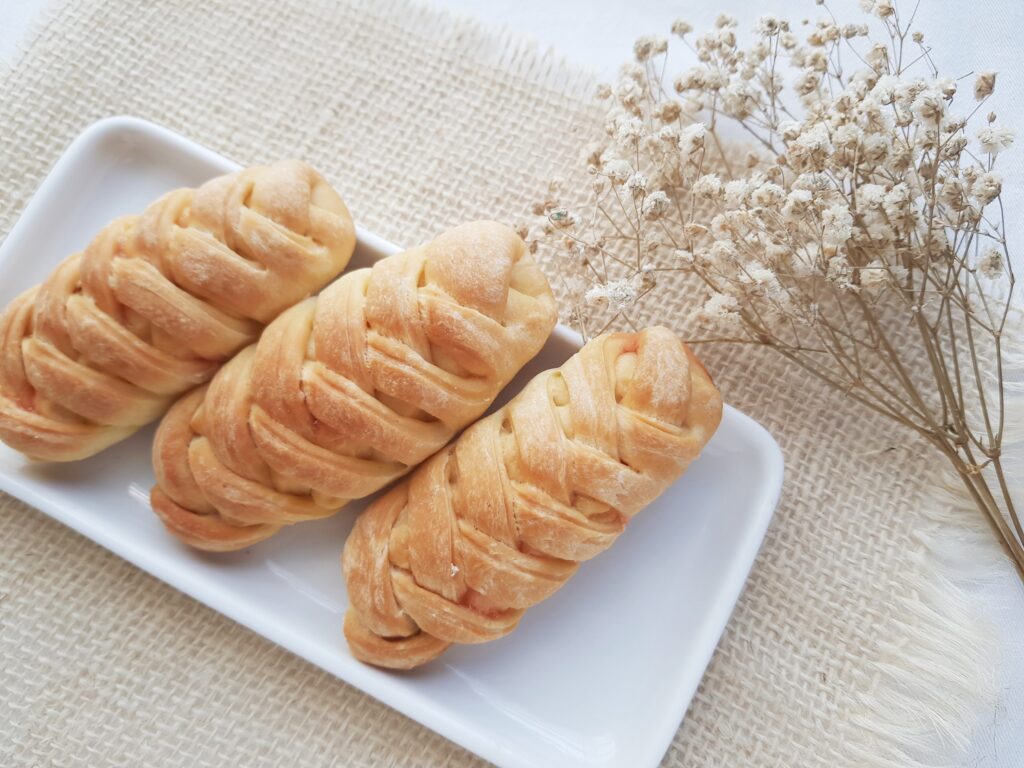
Step 10: Brush the braided buns with melted butter, sprinkle with sesame seeds and herbs, and place on a baking tray.
Step 11: Bake your braided buns at 190°F for 20–25 minutes, until golden brown and smelling amazing.
Serving Ideas for the Braided Buns
- Pair them with soup on a chilly evening.
- Make mini ham-and-cheese versions for lunch.
- Try a cinnamon-sugar filling for breakfast.
- Or just eat them warm with butter—no explanation needed.
This recipe is a little more involved, which makes it perfect for a Saturday or Sunday afternoon when you don’t mind lingering in the kitchen. By the time the buns are cooling on the counter, you’ll have that magical combination of a cozy-smelling home and kids proudly saying, “We made those!”
So, homeschool mamas, light a fall candle, put on some music, and enjoy this little baking project. Your house will smell amazing, your kids will be thrilled with the braiding process, and you’ll have a basket of warm, homemade buns to show for it.
Baked Braided Buns
Ingredients
- 250g all-purpose flour (2 cups)
- 115 ml lukewarm milk
- 1 egg
- 1 tsp yeast
- ¾ tsp salt
- 3 tbsp sugar
- 4 tsp butter
- Sesame seeds and oregano or herbs of your choice
- 4 tbsp powdered milk
Instructions
- Add the yeast and sugar into lukewarm milk and stir thoroughly to mix them.
- In a separate bowl, sift in the flour, powdered milk, and salt. Mix them nicely.
- Add the yeast-milk mixture to the flour. Melt the butter, cool it down and add it to the flour bowl. Add the egg to the flour as well. Mix all the ingredients together nicely.
- Once all the ingredients are well incorporated, start kneading the dough by hand. At first the dough texture will be sticky, but the sticky-texture will reduce as you keep kneading. Add a few tbsp of flour if needed but avoid adding too much.
- Once the dough is smooth and not sticky anymore, form a ball shape with the dough. Place the dough in a bowl, brush the dough with oil and rest it for an hour.
- After an hour, take out the dough, the size of the dough should double by an hour. Roll the dough on a rolling board or on a flat and smooth surface. Roll the dough into a long shape.
- Cut the dough roll into several small and even sections.
- Take any one of the small sections and form a flat ball shape with it.
- Use a rolling pin to flatten the dough ball. Try to form a square shape with the dough. Use your hands to stretch the dough and form the 4 corners of the square shape. Roll the dough after stretching the 4 corners.
- You can keep the bun empty or you can add a filling of your choice. Add the filling along the middle part of the rolled square dough. Use a knife to cut diagonal slits on both sides (wider sides) of the dough.
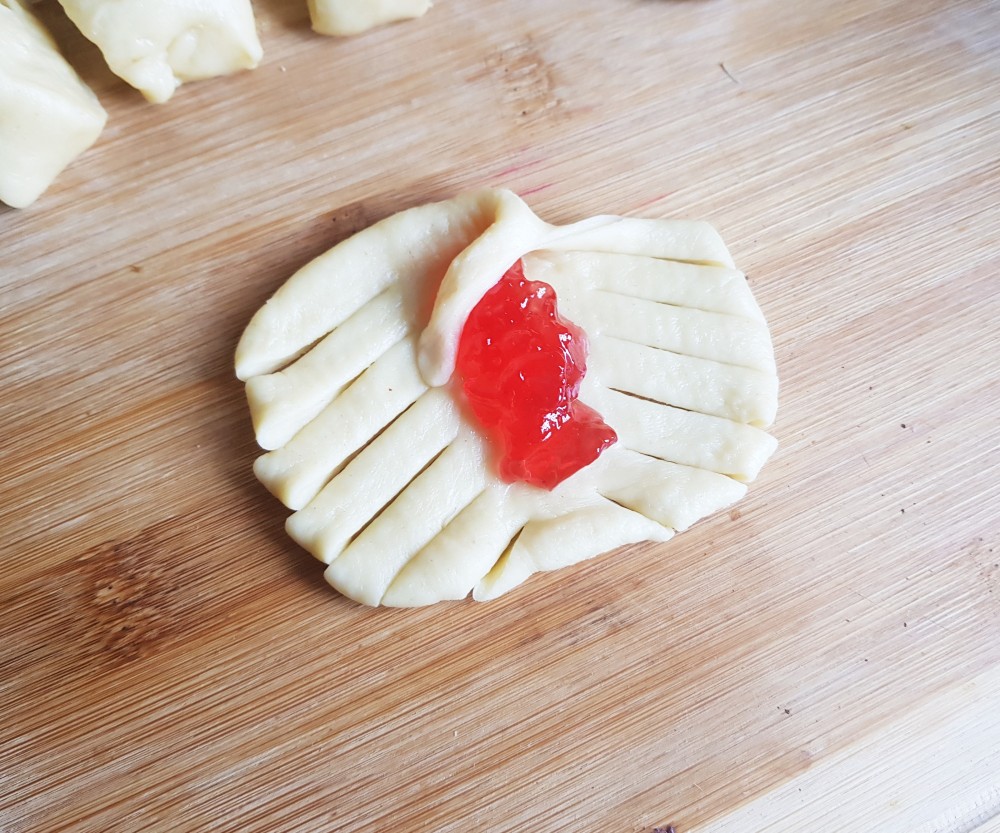
- Hold the top dough strand of either side. Bring the strand over the filling and to the opposite side of it. Press the open end of the dough strand against the dough base to secure it.
- Now, take the top dough strand of the opposite side and similarly draw it over the filling and then pressing its open end to the opposite side of it.
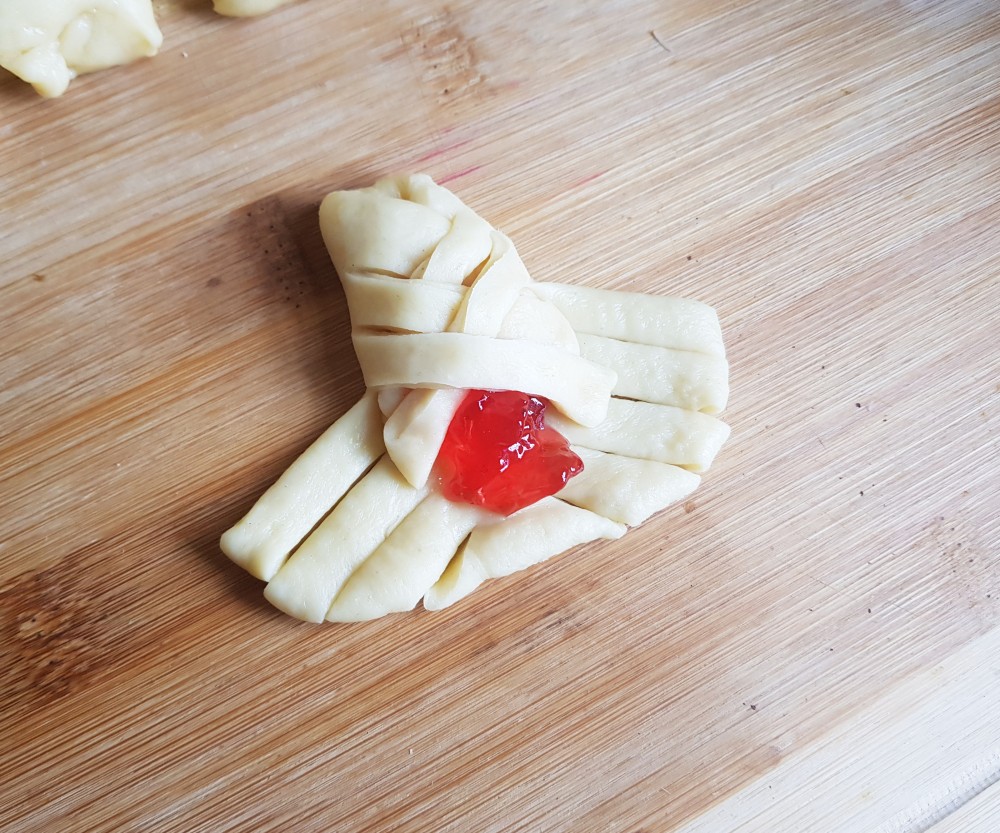
- Continue this process. Remember to draw over a strand of the opposite side for every next step. This will form the braided pattern.
- After reaching the end of the braiding, tuck inside the last strand under the bun base. Brush a little bit of melted butter on the braided bun dough and meanwhile, pre-heat the oven.
- Bake the braided bun dough in 190 degree Fahrenheit, for 20-25 minutes.