Irresistible Cherry Cheese Danishes

Here’s a way to enjoy the sweet, creamy goodness of homemade cherry cheese danishes while not having to make it all from scratch! This delightful pastry combines flaky layers of frozen puff pastry with a luscious cream cheese filling and a burst of juicy cherry flavor.
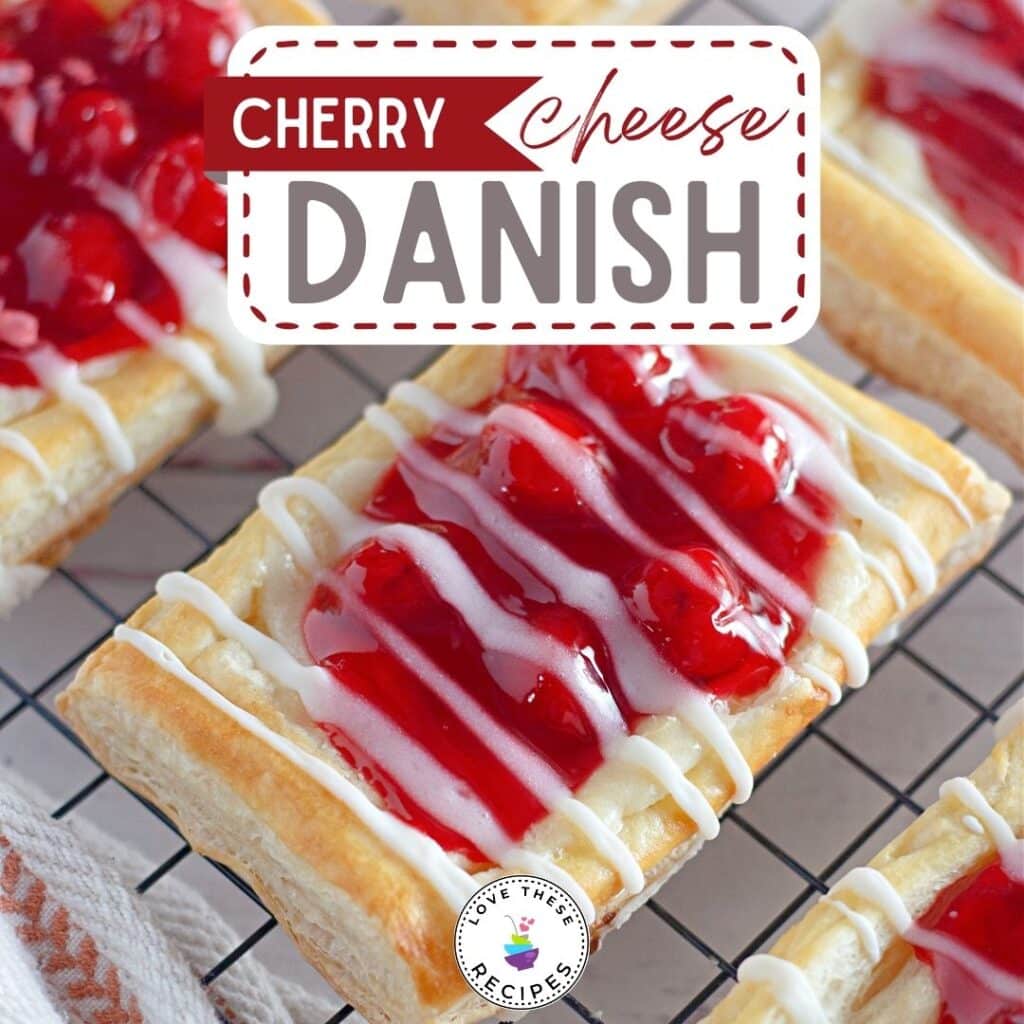
Perfect for breakfast, brunch, or a sweet treat any time of day, these cherry cheese danishes are sure to become a family favorite. Follow along as we guide you through the simple steps to create these irresistible pastries in your kitchen. By the way, any cherry pie filling will work, including the “extra cherry” variety. You can also substitute other flavors of pie filling for the cherry, such as raspberry, blueberry, lemon, or apple.
The pastries should be stored in the refrigerator and they will keep fresh for up to five days. They can be reheated in the microwave on high for 10-20 seconds.
Ingredients for Cherry Cheese Danishes
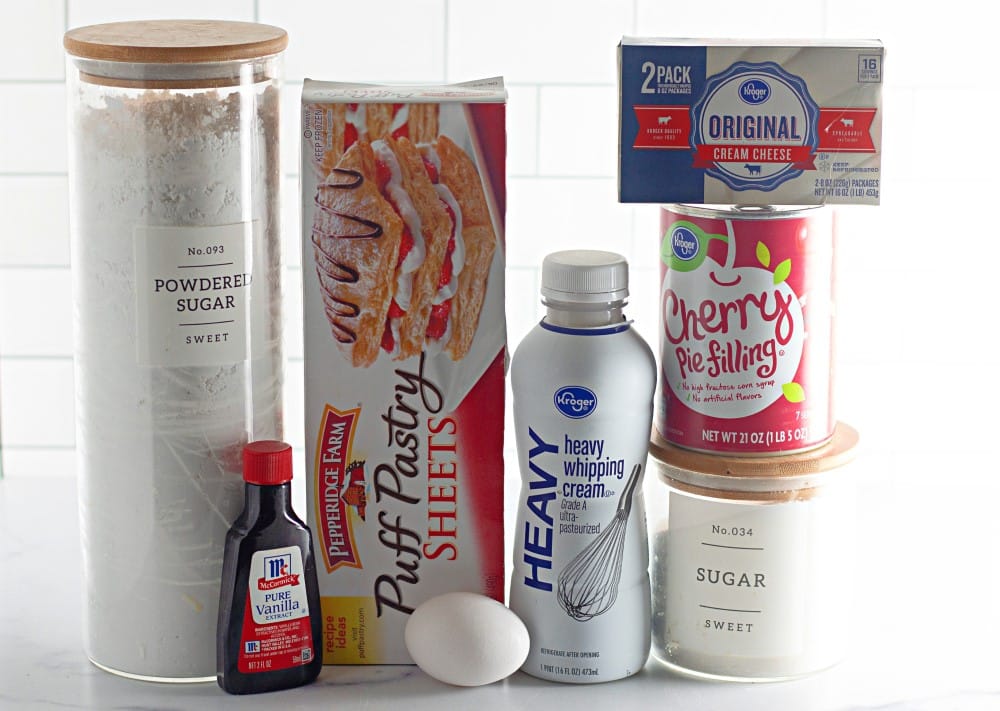
- 1 box (17.3 ounces) frozen puff pastry, thawed
- 1 (8-ounce) package cream cheese, softened to room temperature
- ¼ cup granulated sugar
- 1 ½ teaspoons vanilla extract, divided
- 1 egg
- 2 tablespoons water
- 1 can cherry pie filling
- 1/3 cup powdered sugar
- 2 tablespoons heavy cream
How to Make the Cherry Cheese Danishes
Step One:
Preheat oven to 400F.
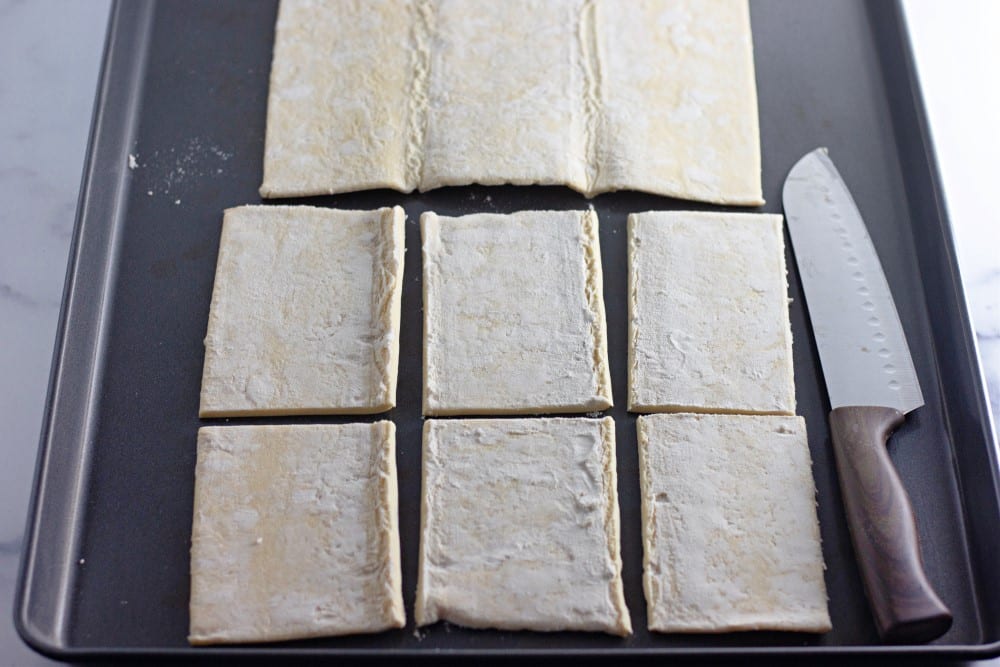
Step Two:
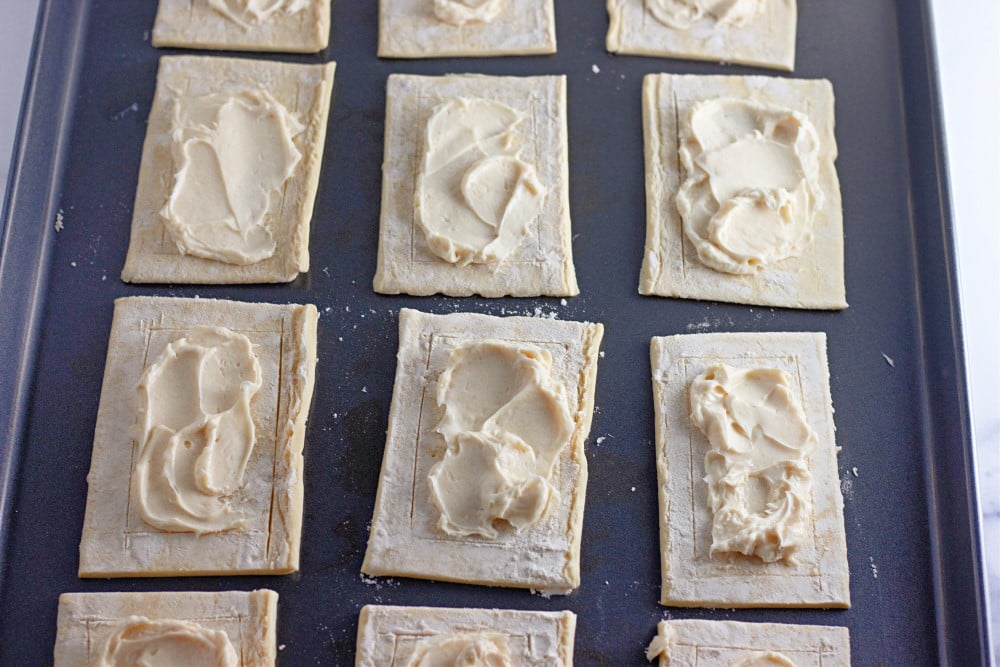
Lay the two sheets of thawed puff pastry out flat on a clean work surface. Use a sharp knife to cut each sheet into 6 rectangles, making 12 total rectangles.
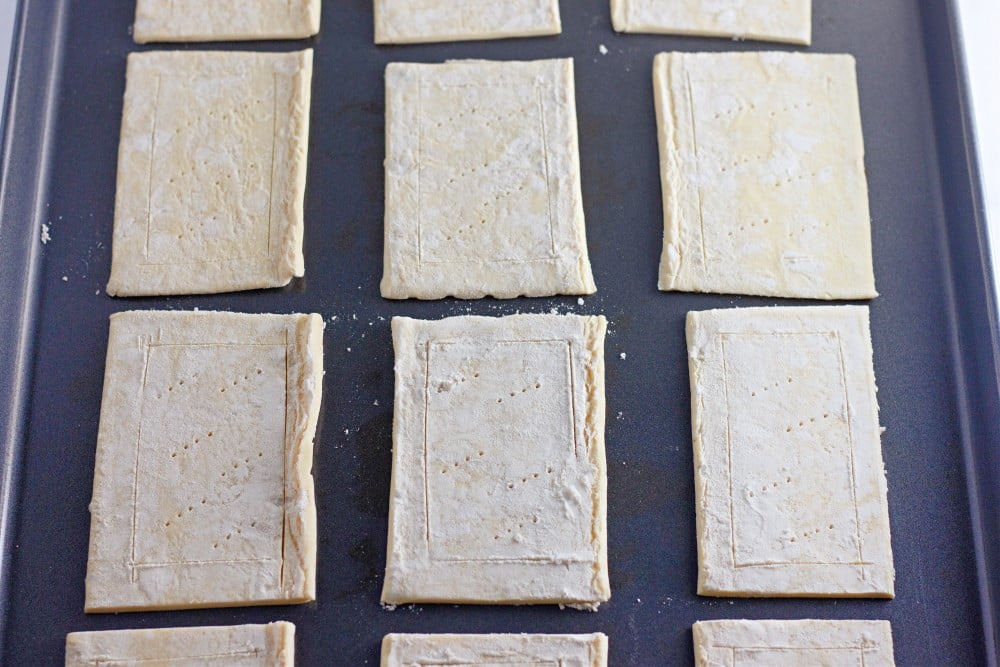
Step Three:
Use the knife to score a ½ inch border around each rectangle (only cut about ½ way down into the dough). This will allow the outside ½ inch border to puff up while baking and the middle to stay flatter.
Step Four:
Use a fork to prick several areas around the middle of each rectangle of pastry. This helps to keep the center from rising too much while baking.
Step Five:
Place the pastries onto one large or two medium baking sheets, about 1 inch apart.
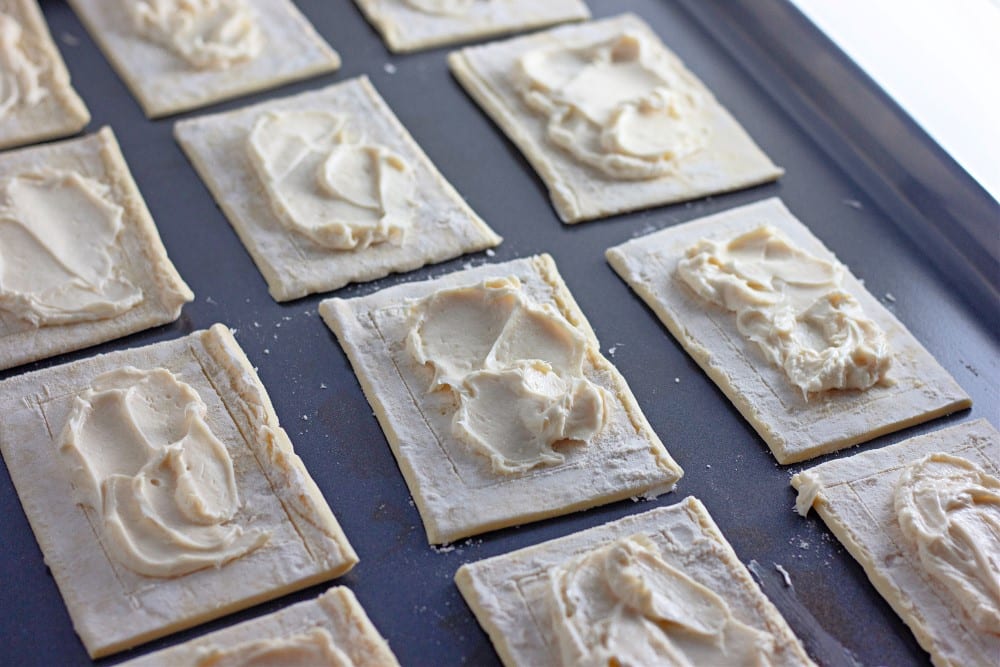
Step Six:
In a medium mixing bowl, use an electric mixer to beat together the cream cheese, granulated sugar, and 1 teaspoon of the vanilla extract. Scoop the mixture onto the pastries and spread out evenly over the center area, but not onto the ½ inch border.
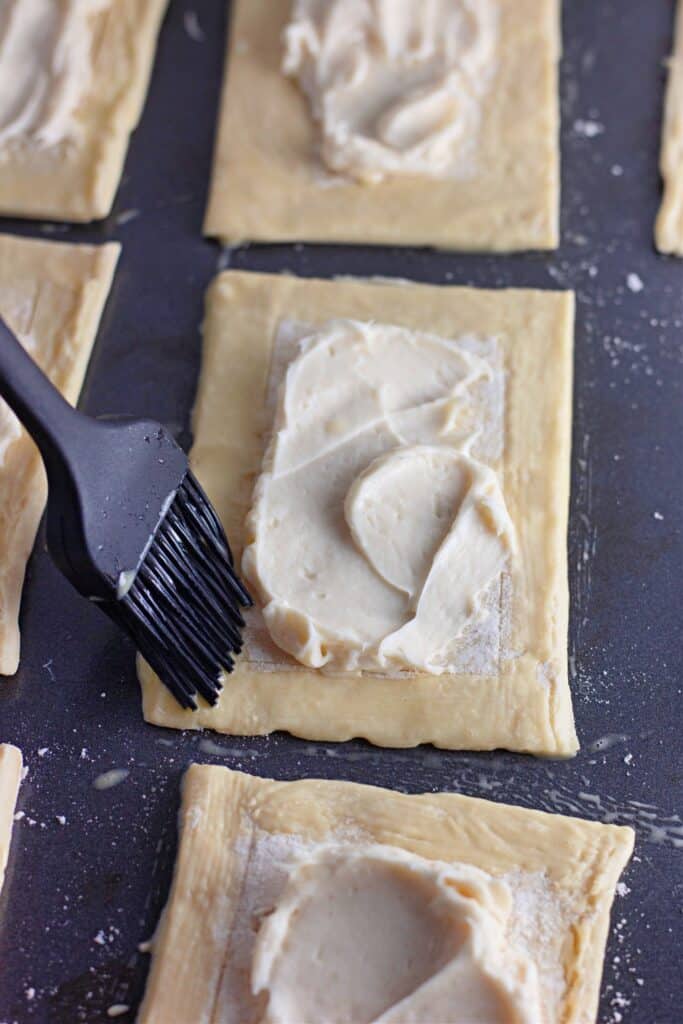
Step Seven:
In a small bowl, whisk together the egg and water. Use a pastry brush to lightly brush the egg wash onto the ½ inch border of each pastry.
Step Eight:
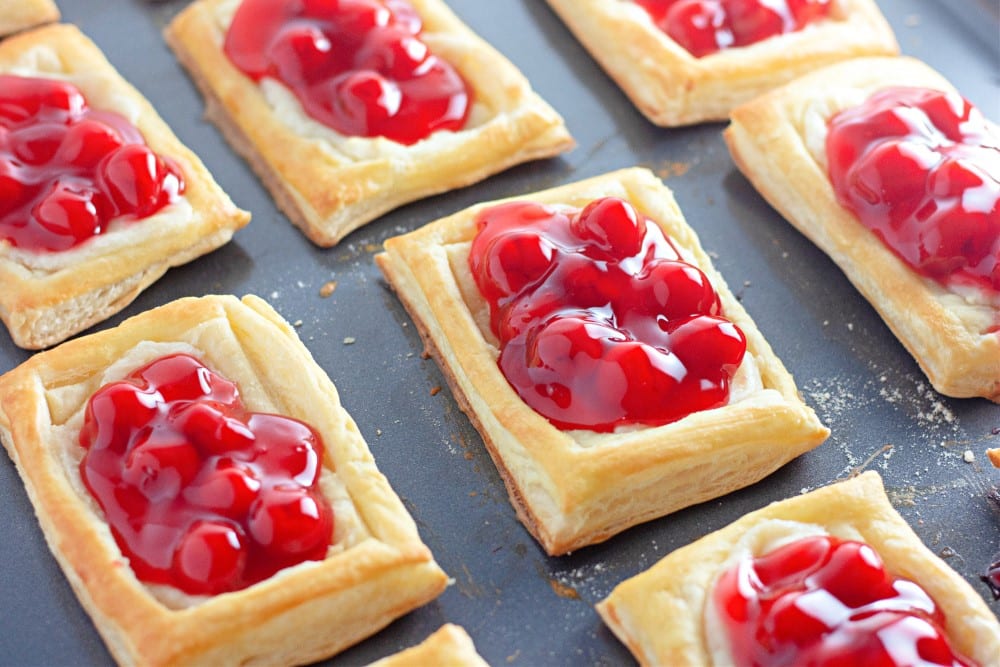
Bake the pastries at 400F for 18-20 minutes until the pastry is puffed up and golden brown. Remove from the oven and transfer the in-process cherry cheese danishes to a wire cooling rack.
Step Nine:
While the pastries are still warm, add a spoonful of the cherry pie filling to the center of each pastry and spread out just enough to mostly cover the cream cheese layer.
Step Ten:
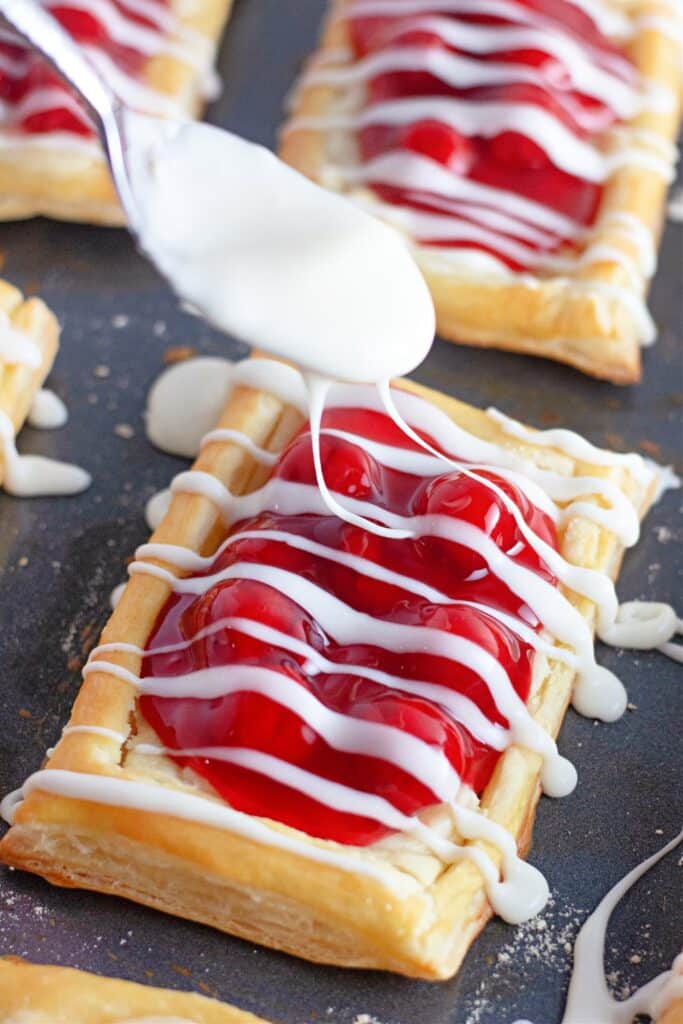
In a small bowl, whisk together the powdered sugar, heavy cream, and remaining ½ teaspoon vanilla extract. Drizzle the frosting over the cooled cherry cheese danishes.
More Delectable Recipes
Looking for more tasty treats in the vein of these cherry cheese danishes? If you’re feeling overwhelmed with all the to-dos you have as a mom, here are a few more tasty treats that are simple to make.

Delicate Cherry Cheese Danishes
- Yield: 12 servings 1x
Ingredients
- 1 box (17.3 ounces) frozen puff pastry, thawed
- 1 (8 ounce) package cream cheese, softened to room temperature
- ¼ cup granulated sugar
- 1 ½ teaspoons vanilla extract, divided
- 1 egg
- 2 tablespoons water
- 1 can cherry pie filling
- 1/3 cup powdered sugar
- 2 tablespoons heavy cream
Instructions
- Preheat oven to 400F.
- Lay the two sheets of thawed puff pastry out flat on a clean work surface. Use a sharp knife to cut each sheet into 6 rectangles, making 12 total rectangles.
- Use the knife to score a ½ inch border around each rectangle (only cut about ½ way down into the dough). This will allow the outside ½ inch border to puff up while baking and the middle to stay flatter.
- Use a fork to prick several areas around the middle of each rectangle of pastry. This helps to keep the center from rising too much while baking.
- Place the pastries onto one large or two medium baking sheets, about 1 inch apart.
- In a medium mixing bowl, use an electric mixer to beat together the cream cheese, granulated sugar, and 1 teaspoon of the vanilla extract. Scoop the mixture onto the pastries and spread out evenly over the center area, but not onto the ½ inch border.
- In a small bowl, whisk together the egg and water. Use a pastry brush to lightly brush the egg wash onto the ½ inch border of each pastry.
- Bake the pastries at 400F for 18-20 minutes until the pastry is puffed up and golden brown. Remove from the oven and transfer the pastries to a wire cooling rack.
- While the pastries are still warm, add a spoonful of the cherry pie filling to the center of each pastry and spread out just enough to mostly cover the cream cheese layer.
- In a small bowl, whisk together the powdered sugar, heavy cream, and remaining ½ teaspoon vanilla extract. Drizzle the frosting over the cooled pastries.
Notes
- Any cherry pie filling will work, including the “extra cherry” variety.
- Other pie filling can be substituted for the cherry, such as raspberry, blueberry, lemon, apple, etc.
- The pastries should be stored in the refrigerator and keep fresh for up to five days. They can be reheated in the microwave on high for 10-20 seconds.